Creating a webhook
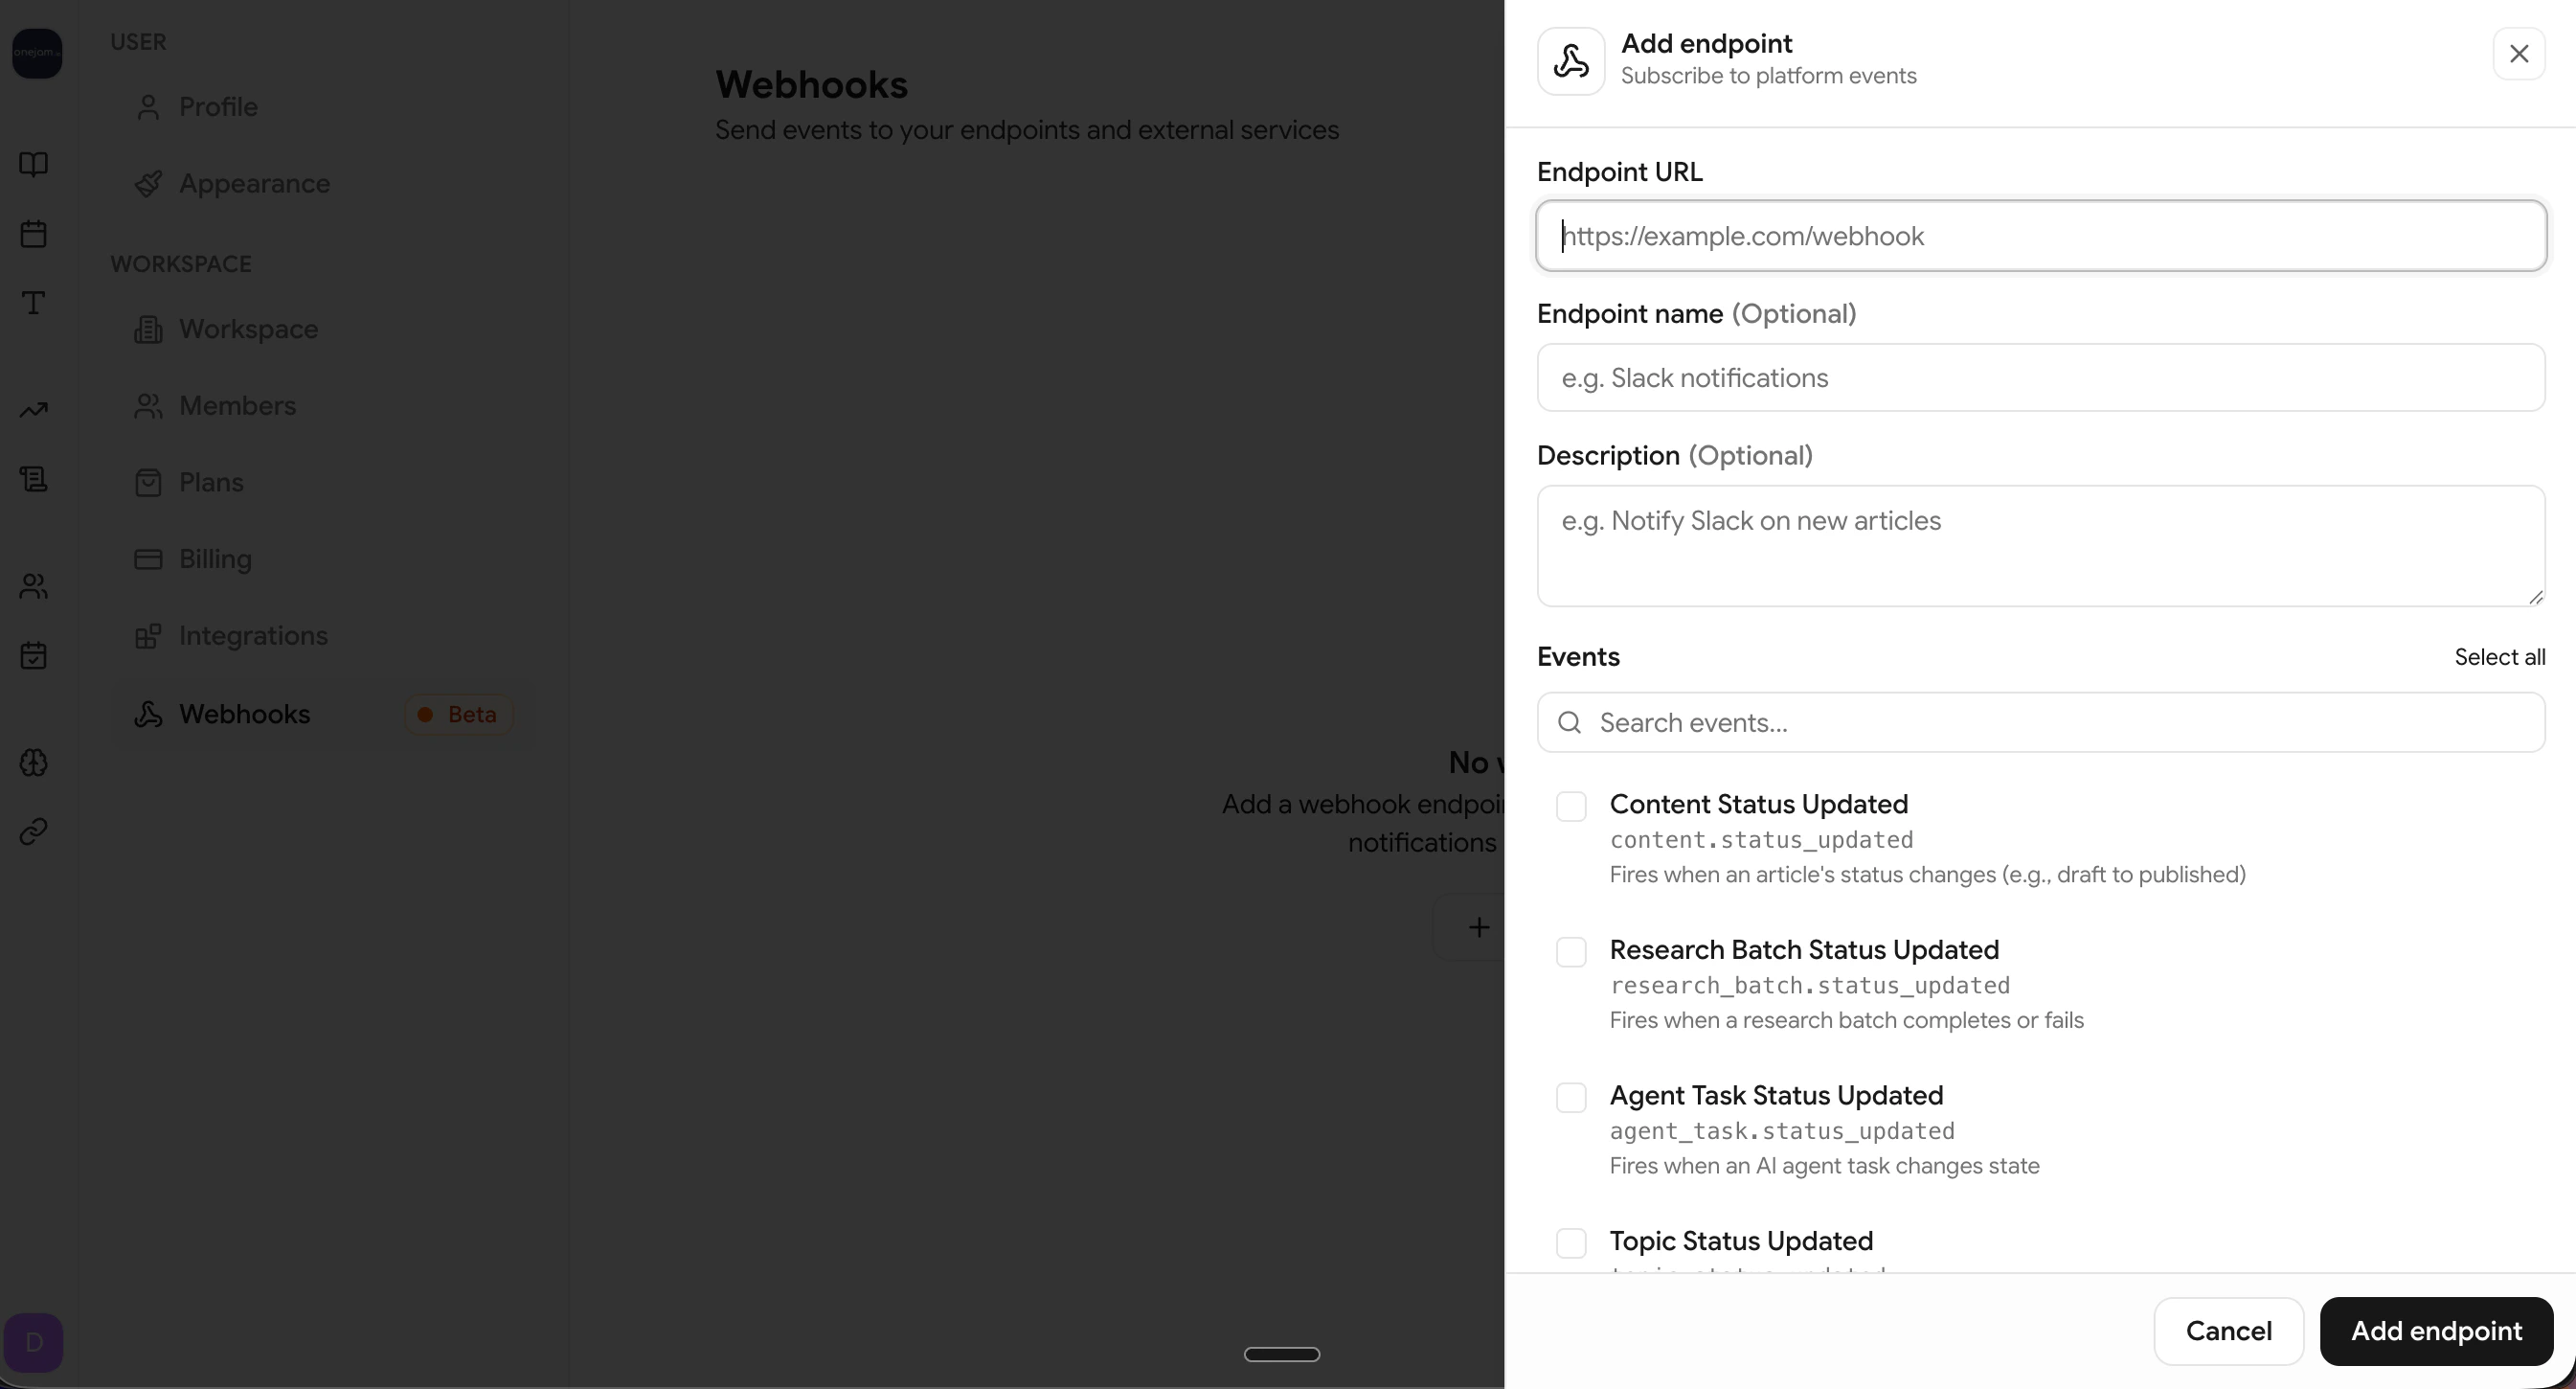
Configure the endpoint
Fill in the webhook details:
- URL — The HTTPS endpoint that will receive deliveries
- Name — A friendly label (e.g., “Production CMS Sync”)
- Description — What this webhook is used for (optional)
Choose events
Select one or more event types to subscribe to. See the Event Catalog for details on each event.
Save and copy the signing secret
After saving, your signing secret is displayed once. Copy it and store it securely — you’ll need it to verify signatures.
Viewing your webhooks
The webhooks list shows each endpoint’s status, subscribed events, and error rate at a glance.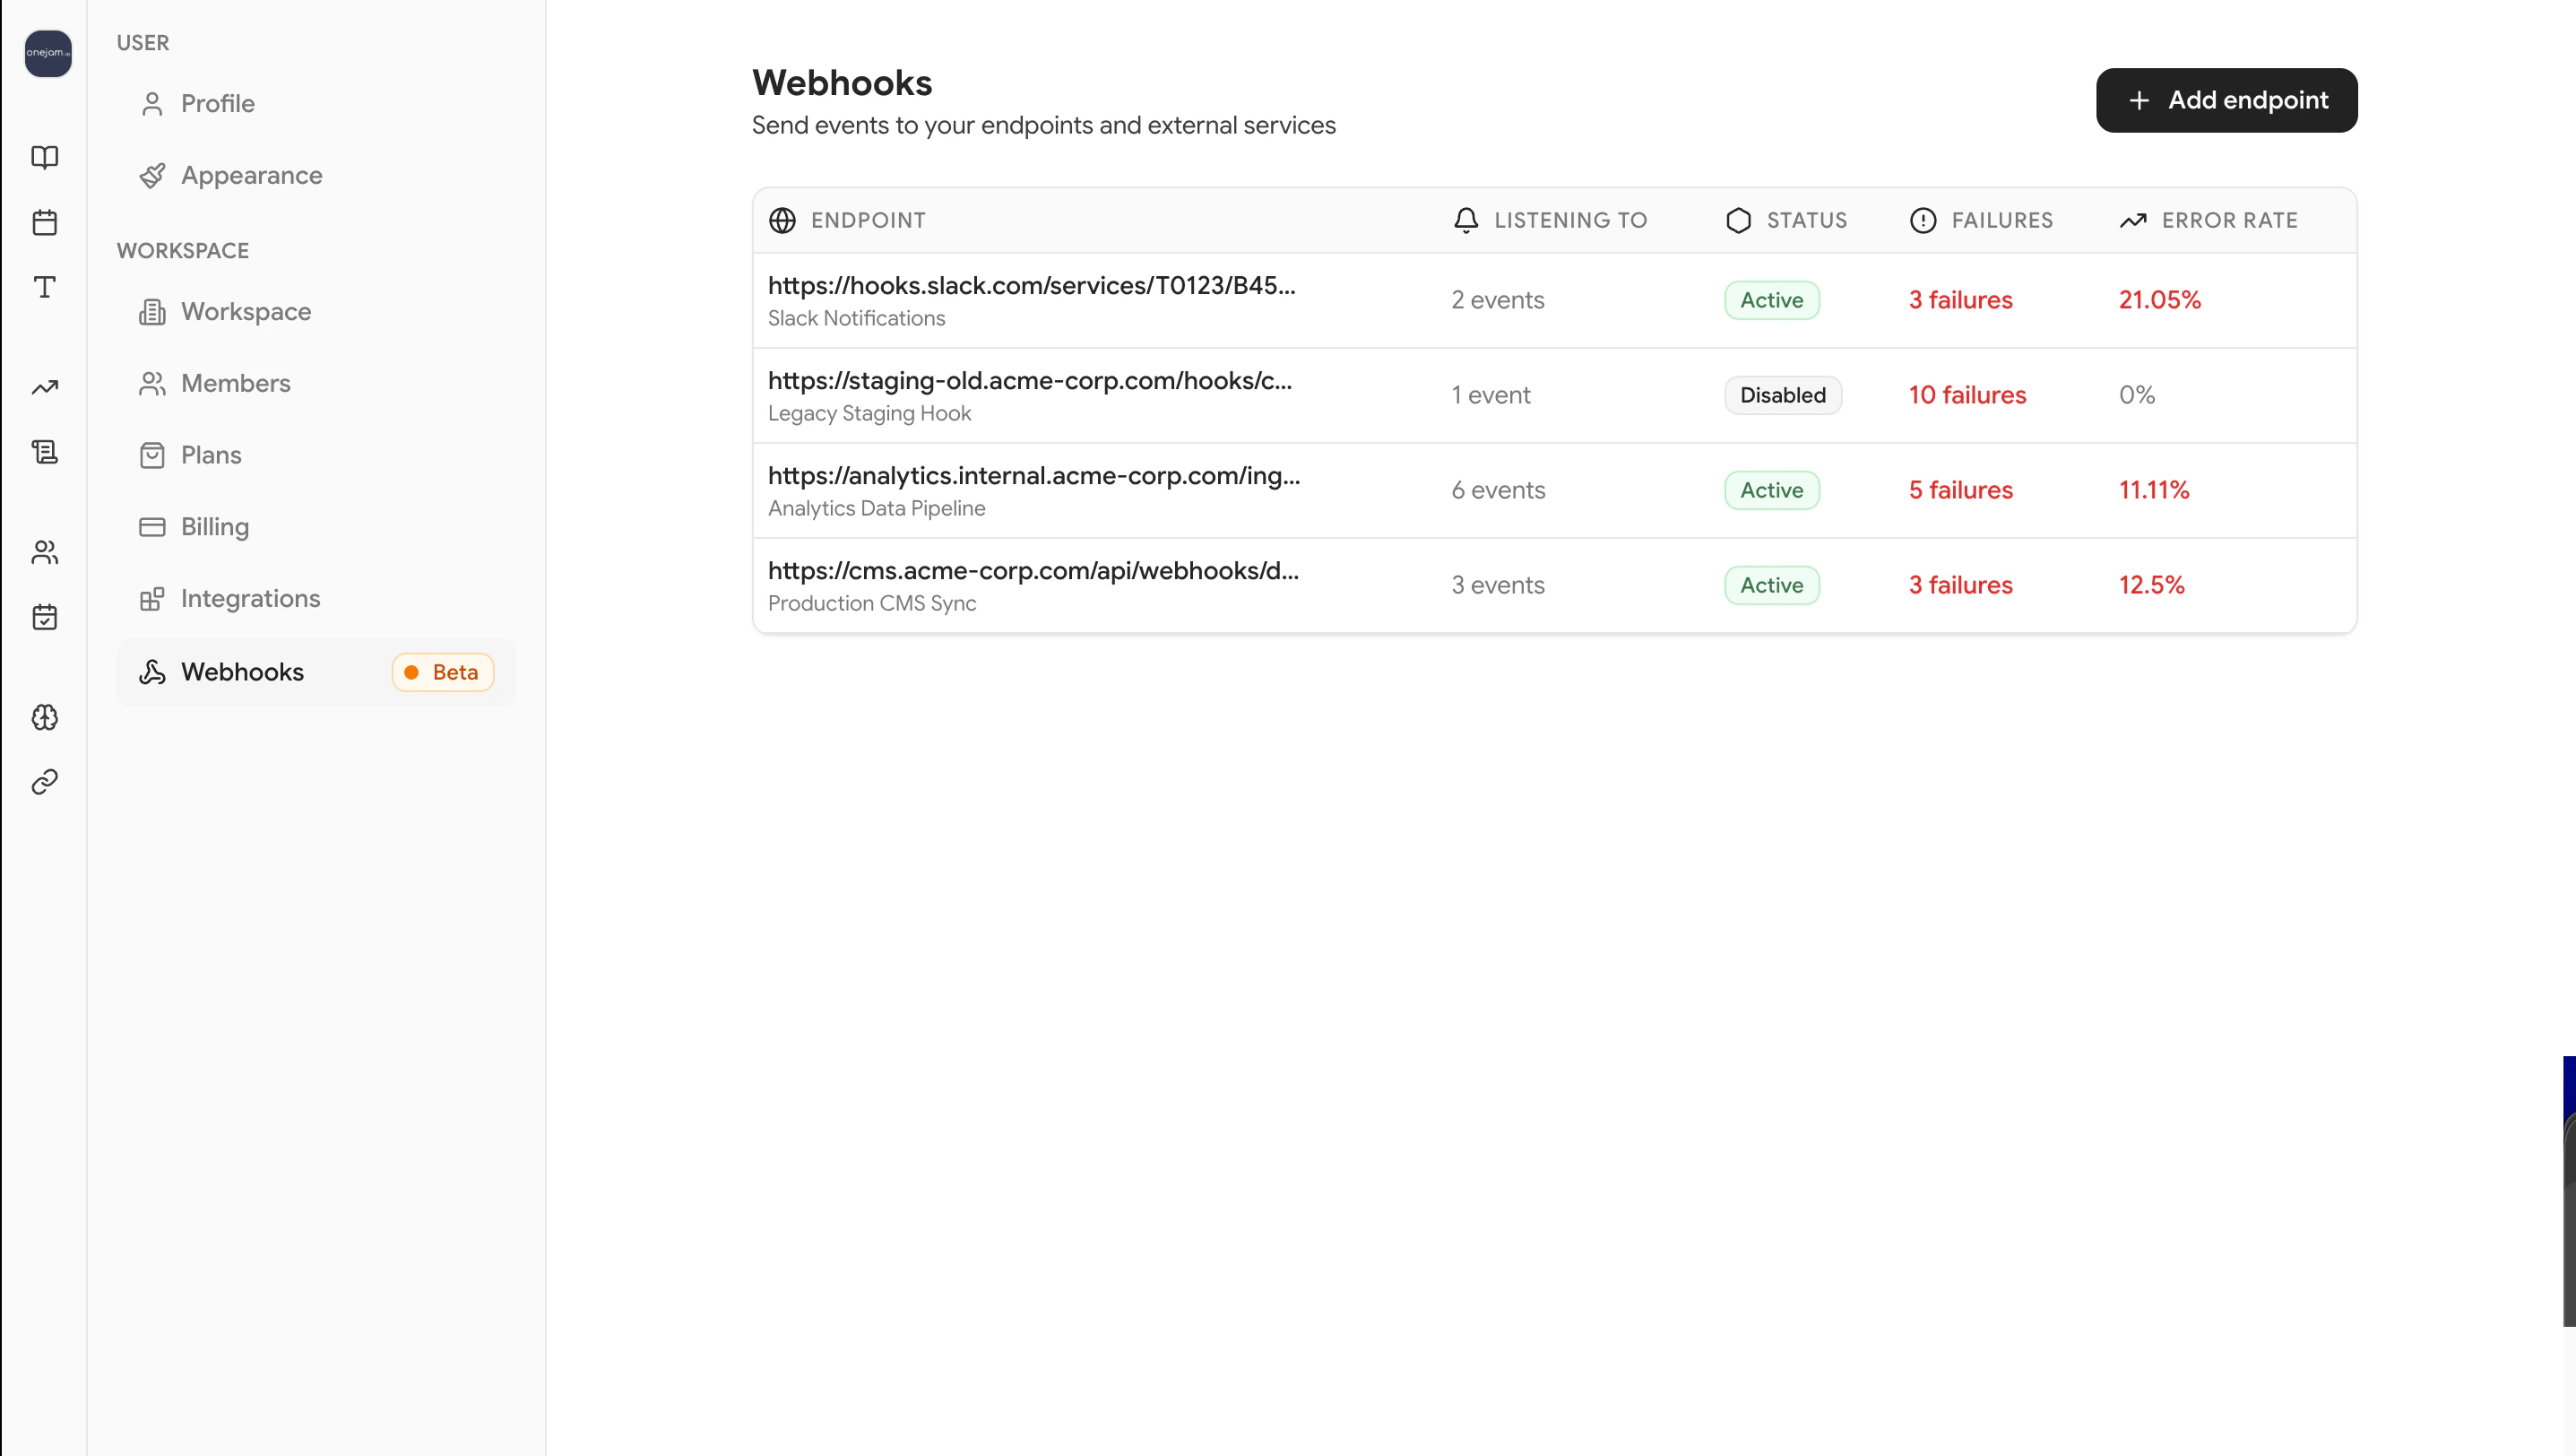
| Field | Description |
|---|---|
| Status | ACTIVE or DISABLED |
| Events | Which event types the webhook is subscribed to |
| Error rate | Percentage of failed deliveries over the last 7 days |
| Consecutive failures | Current streak of failed deliveries (auto-disables at 10) |
Editing a webhook
Click on any webhook to update its URL, name, description, or event subscriptions.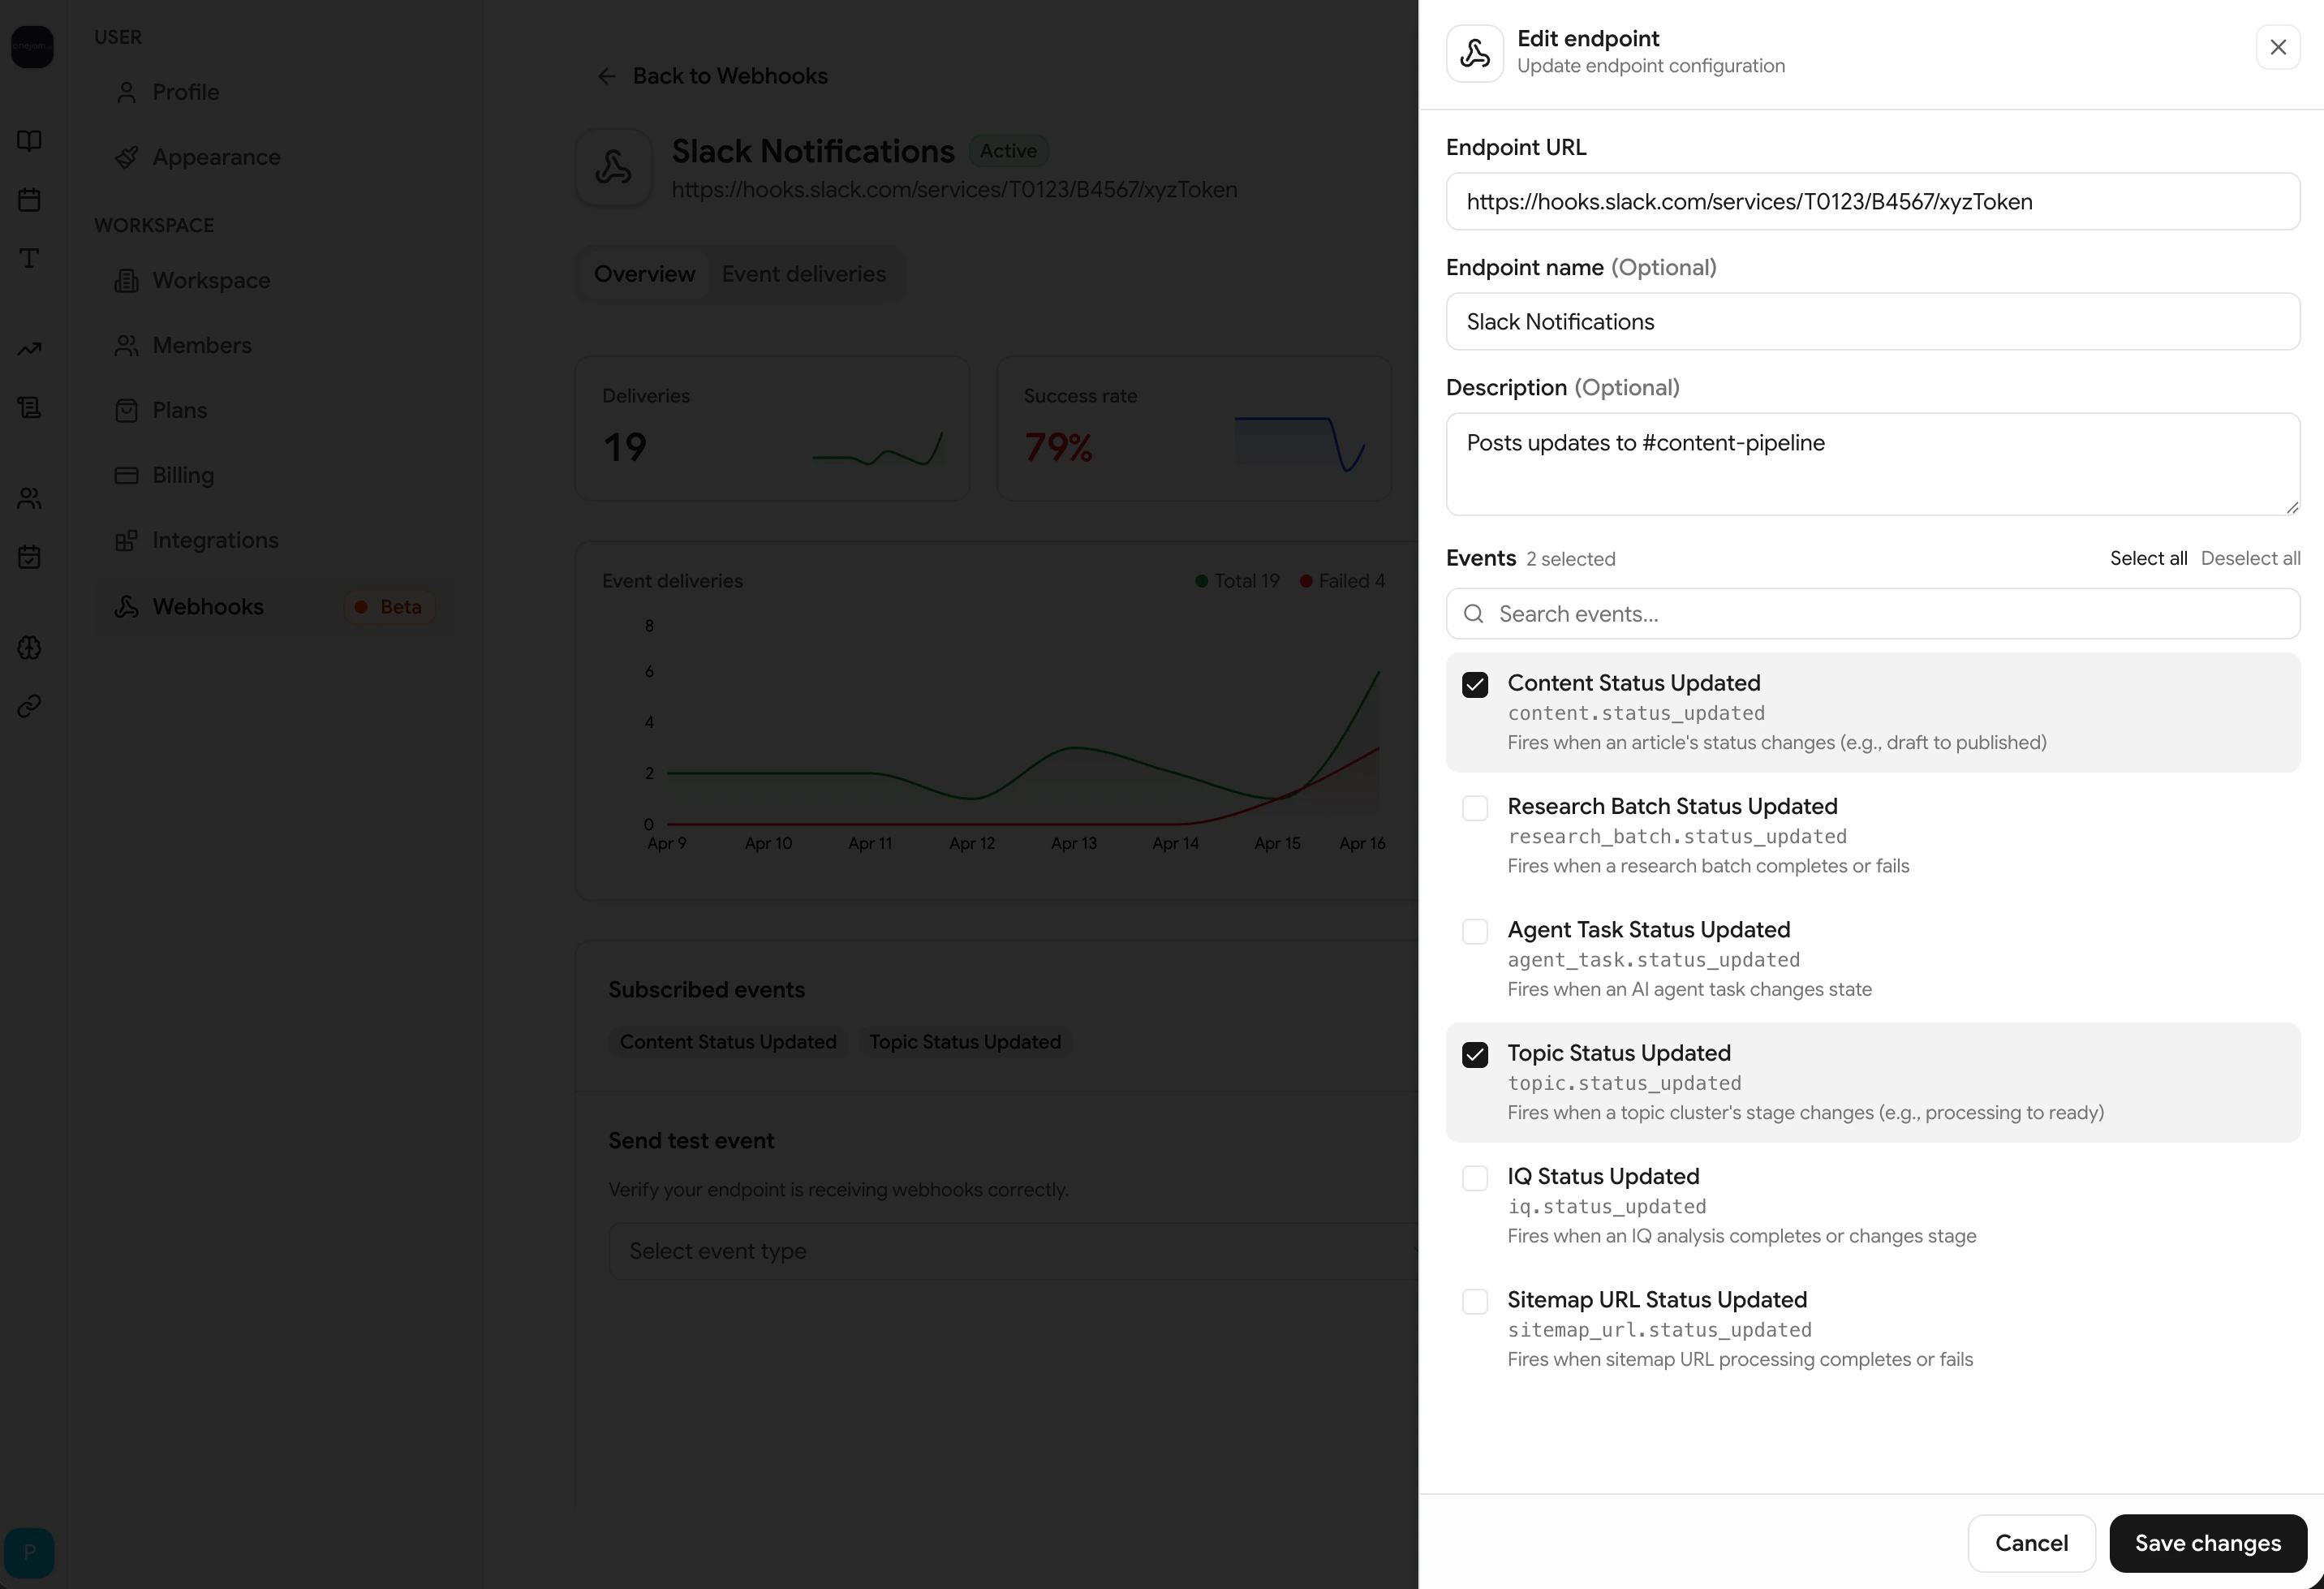
When updating events, the entire subscription list is replaced. Make sure all the events you want are selected.
Enabling and disabling
Toggle a webhook’s status directly from the webhook detail page:- Enable — Reactivates the webhook and resets the failure counter to 0
- Disable — Pauses all deliveries until re-enabled
Deleting a webhook
Click Delete to remove a webhook. Any pending deliveries in the queue will be skipped.Sending a test event
Before going live, verify your endpoint by sending a test delivery.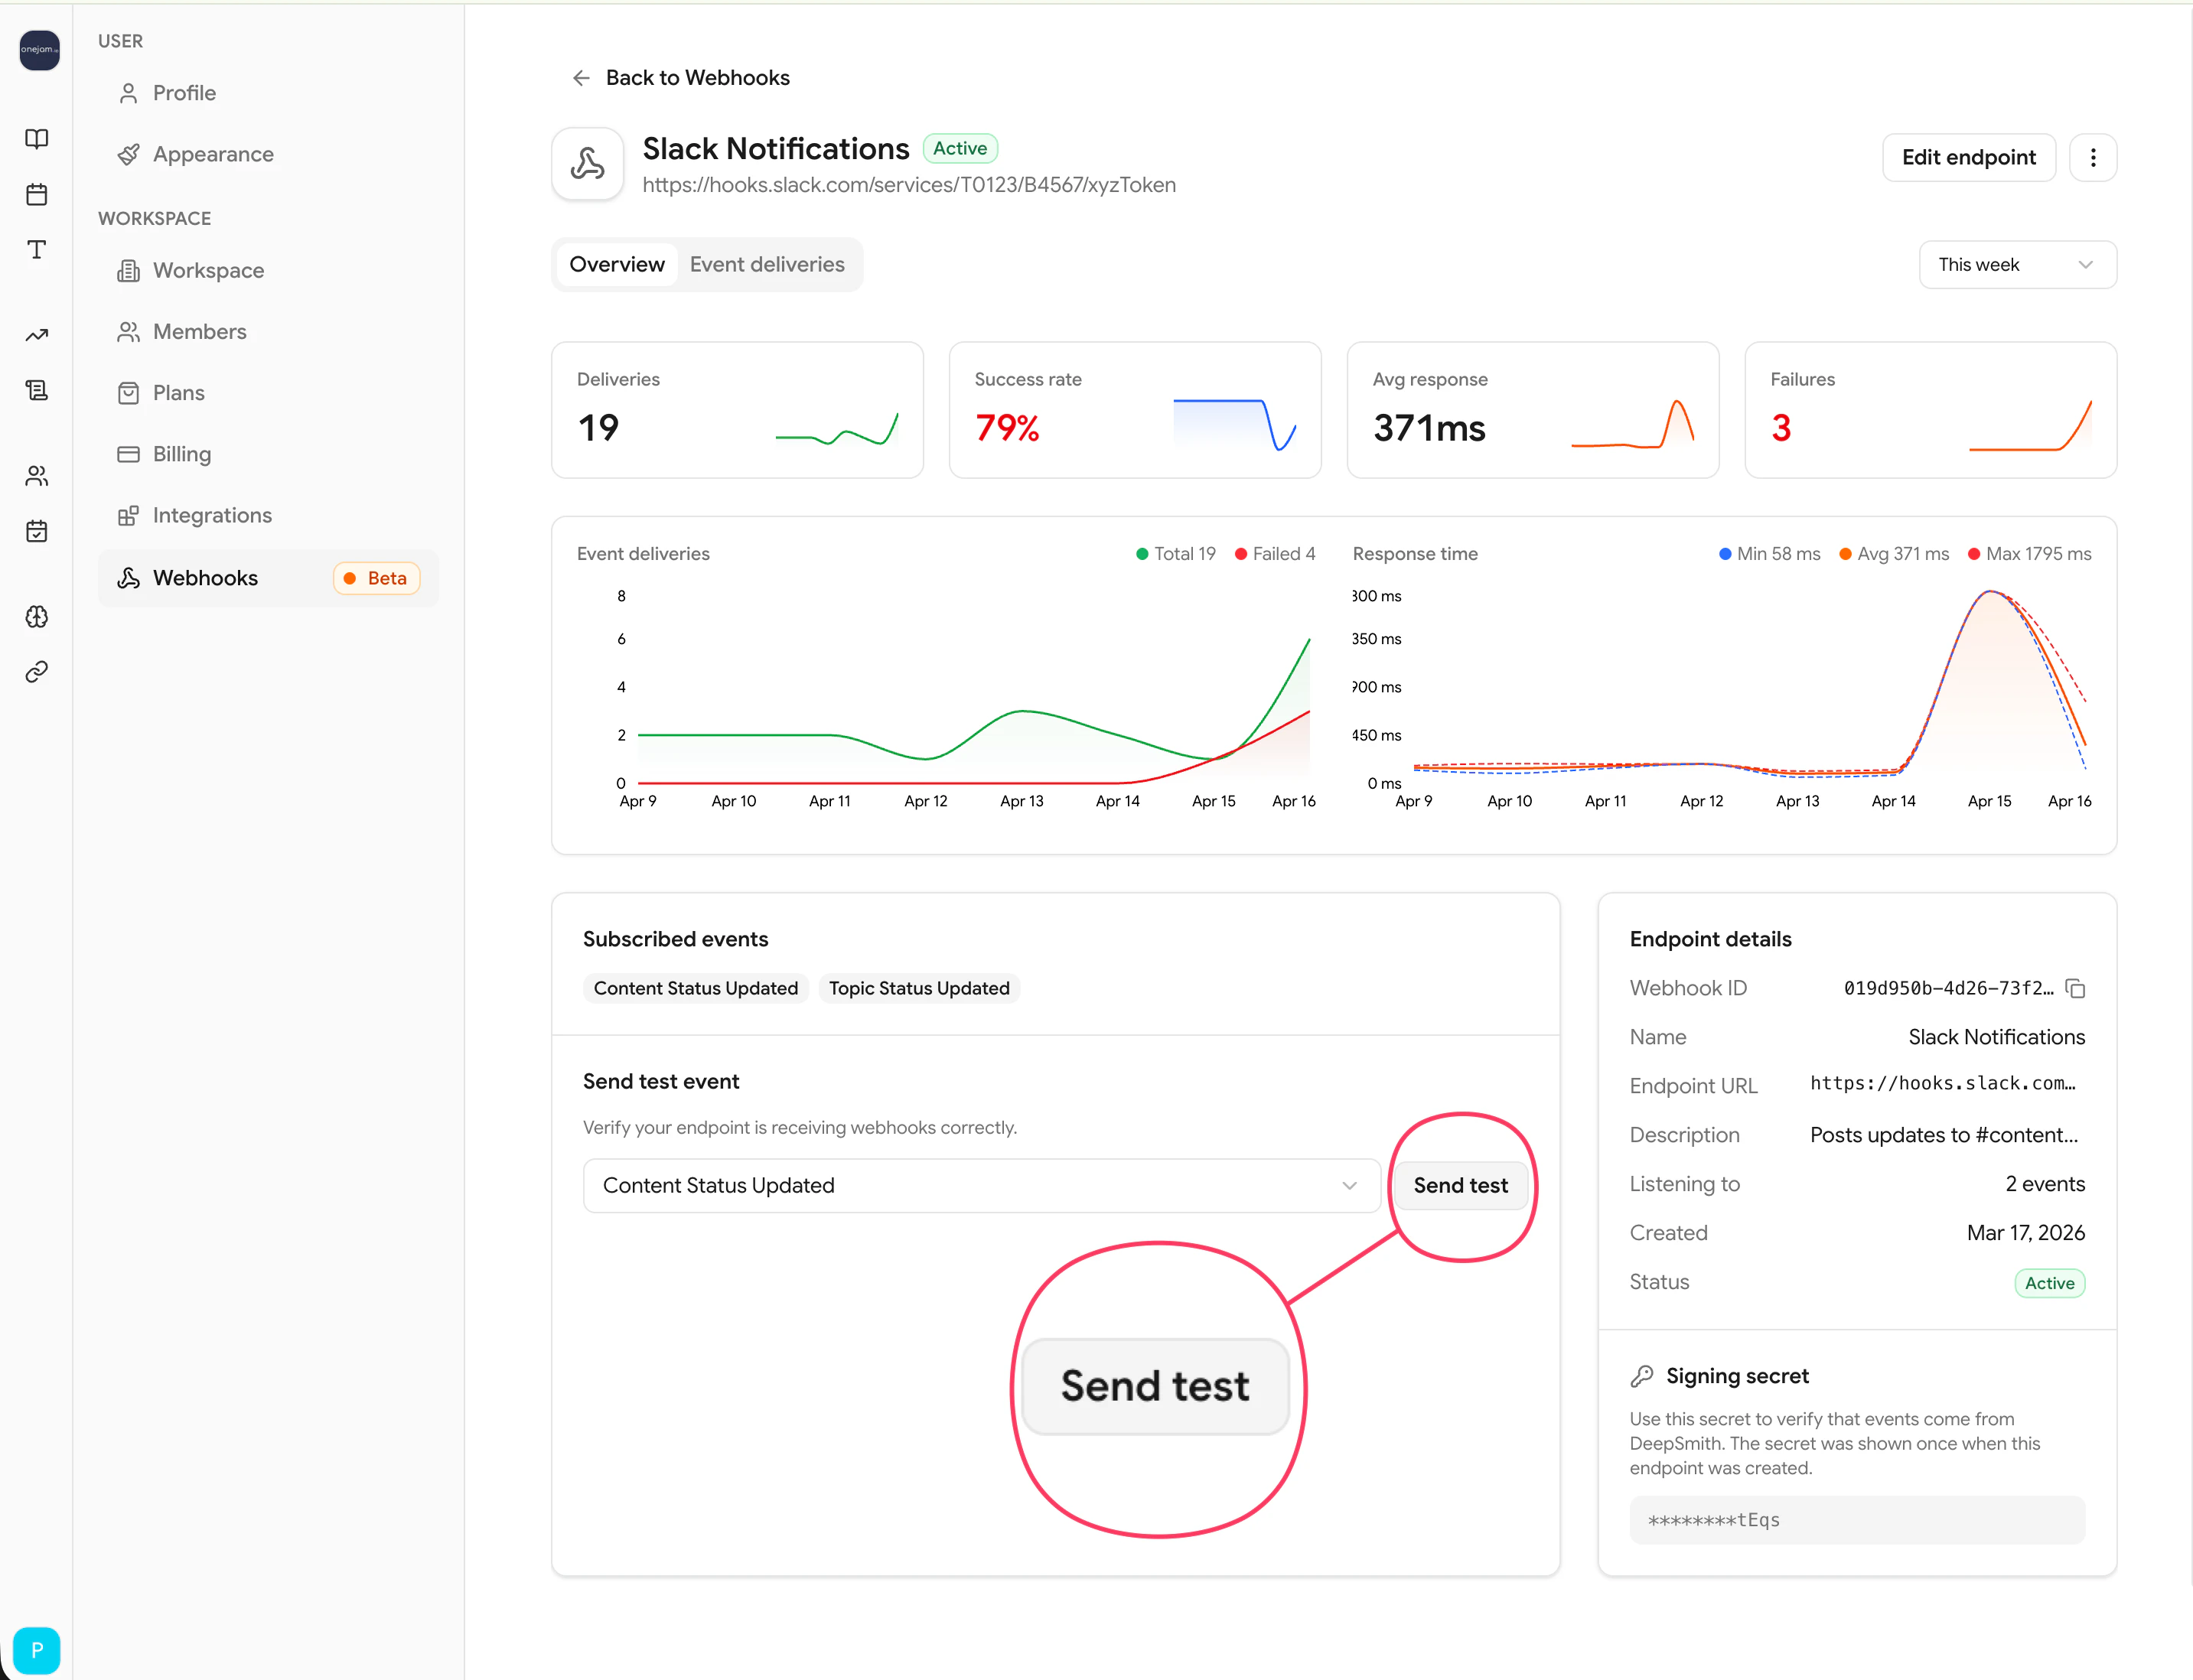
- Have
is_test: truein the payload - Are marked with a Test badge in the delivery history
- Work even when the webhook is disabled
- Use sample payloads with zeroed UUIDs (
00000000-0000-0000-0000-000000000000)
Webhook statuses
| Status | Description |
|---|---|
ACTIVE | Receiving deliveries normally |
DISABLED | Paused — either manually disabled or auto-disabled after 10 consecutive failures |
When a webhook reaches 10 consecutive failures, DeepSmith automatically disables it to protect your endpoint. Re-enable it from the platform after fixing the underlying issue.